Software Update Instructions
1. Download the Update
Click the Download button below. Open each file and press Download, then copy all downloaded files onto your USB‑C drive using your desktop computer.
2. Power On the Robera Pro
Turn on your Robera Pro Buggy and wait around 40 seconds until you hear “AI Ready.”
3. Unlock the Buggy
Press the Unlock button on the remote handset while standing next to the buggy. The indicator light will turn green.
4. Insert the USB‑C Drive
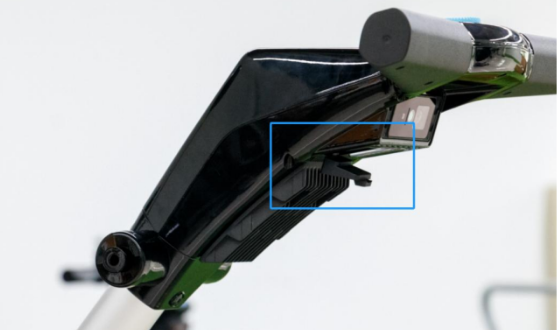
Plug your USB‑C drive into the USB‑C port on the Robera Pro buggy. It is located under the handle. Pull back the rubber protector to access the ports. The USB-C connector is the lower of the two ports.
Notes
- USB Detection: Ensure the buggy recognizes the drive by checking for the USB symbol on the LCD screen.
- Correct Port:
• USB‑C port → software upgrades
• USB‑A port → charging only - Upgrade Process: When the upgrade begins, you will hear “Start motor upgrade.” Wait 5–10 minutes until you hear “AI Ready” again.
- If You Hear “Upgrade Failed”: Remove the USB‑C drive, reinsert it, and repeat the process.
June 2026 version 64 update